Improvised raised bed
May. 7th, 2022 12:57 pmI put together a new raised bed from some spare materials I scavenged or had lying around:
It's a bit unorthodox, but I think it will work well enough. If it all falls apart, it is unlikely to do so catastrophically, and I can always just move stuff into a new container at the end of the season.
The neighbors had thrown out this big 50 gallon plastic tub, presumably because it had a couple cracks on one side. I nabbed it because I saw potential for a large, roughly rectangular, movable raised bed. This is something I've been vaguely wanting.
It also still has a lid. I think I'll be able to put the lid on for the winter, and then if salty sidewalk snow is shoveled on top, it won't contaminate the soil. (Might require some supports, though. Snow is heavy!)
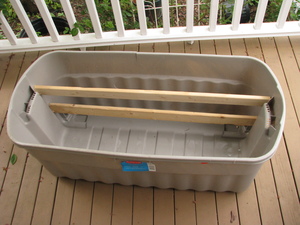
The main problem was the cracks. The soil pressure would cause the tub to bow out on the sides and would worsen the crack over time. One option I thought of was to tie the long side together via cords running through the tub, crosswise, resisting the bowing effect. Another was to brace the tub against something. What I ended up doing was cutting some boards to fit lengthwise so that they were pressing the narrow ends away from each other slightly. This might just cause new point strains on the ends and new cracks there, but it's worth a shot.
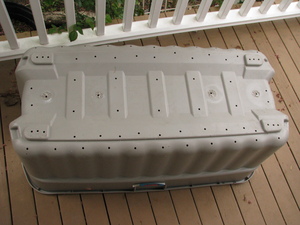
Next I had to provide drainage. I drilled about 70 holes into it along what should be the lowest points. I didn't like all the plastic shreds this generated, but I think I got almost all of it with the vacuum cleaner.
In some places (the last half of the work) I remembered to stagger the holes to avoid creating lines of weakness.
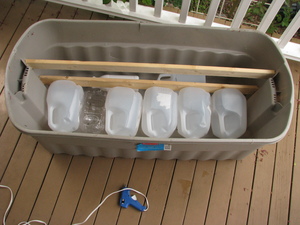
This is the silliest part. I didn't have enough material to fill it with, and I didn't actually need something all *that* deep. And I didn't want it to be so heavy it couldn't be moved. So I solicited some empty bottles from neighbors, tightened their lids (or hot-glued when necessary), and laid them down in the bottom. Now there's less space to fill, and less weight, but still something of a deep reservoir space for excess water to sit in before it exits.
These are all HDPE, same as the tub, so they should be *relatively* innocuous. We'll see if they collapse, or float up through the soil, or something else unwanted. They should stay fairly cool and protected, though.
Another option was to cut the tub shorter and raise it on blocks. Height is desirable for two reasons:
But that would reduce the structural integrity of the container even more.

This is the material I had to work with:
I started by packing straw in around the jugs to create a drainage layer (I hope?) and to use up less-nutrient-rich materials first. (There was also just a lot of straw, although I know it will compress over time.) Then I mixed everything else together, which required quite a lot of elbow grease. I remembered to wear an N95 to avoid breathing rock and soil dust, and it's neat that that's just a thing I have readily at hand these days. :-)
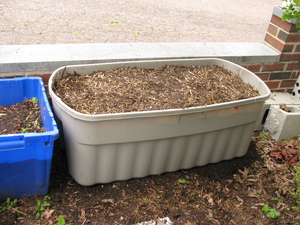
I moved the bin to its final location, which required a little re-grading to give it a flat, level surface to rest on. The cracked side is shoved up against the brick wall as additional reinforcement. The exposed side is likely going to get some sun and may get damage from that, so I may just like... lean some plywood up against it or wrap it with some other sun-blocking material. Dunno.
The straw is going to pack down over time, so I'll need to to pit off occasionally with more soil and compost, but that's fine. I may even consolidate some of my other, smaller pots into this one, which will have a similar effect.
Overall I'm pretty happy with this, and I'm interested to see how it holds up!
- A 50 gallon plastic tub the neighbors were throwing out because it was cracked
- A long flat board someone had used to make a campaign sign, which they then threw out
- Some plastic jugs
- Used potting soil off of Freecycle
- Some old straw that a former upstairs neighbor had intended to use as mushroom substrate
- Worm compost
It's a bit unorthodox, but I think it will work well enough. If it all falls apart, it is unlikely to do so catastrophically, and I can always just move stuff into a new container at the end of the season.
Photos and description
The neighbors had thrown out this big 50 gallon plastic tub, presumably because it had a couple cracks on one side. I nabbed it because I saw potential for a large, roughly rectangular, movable raised bed. This is something I've been vaguely wanting.
It also still has a lid. I think I'll be able to put the lid on for the winter, and then if salty sidewalk snow is shoveled on top, it won't contaminate the soil. (Might require some supports, though. Snow is heavy!)
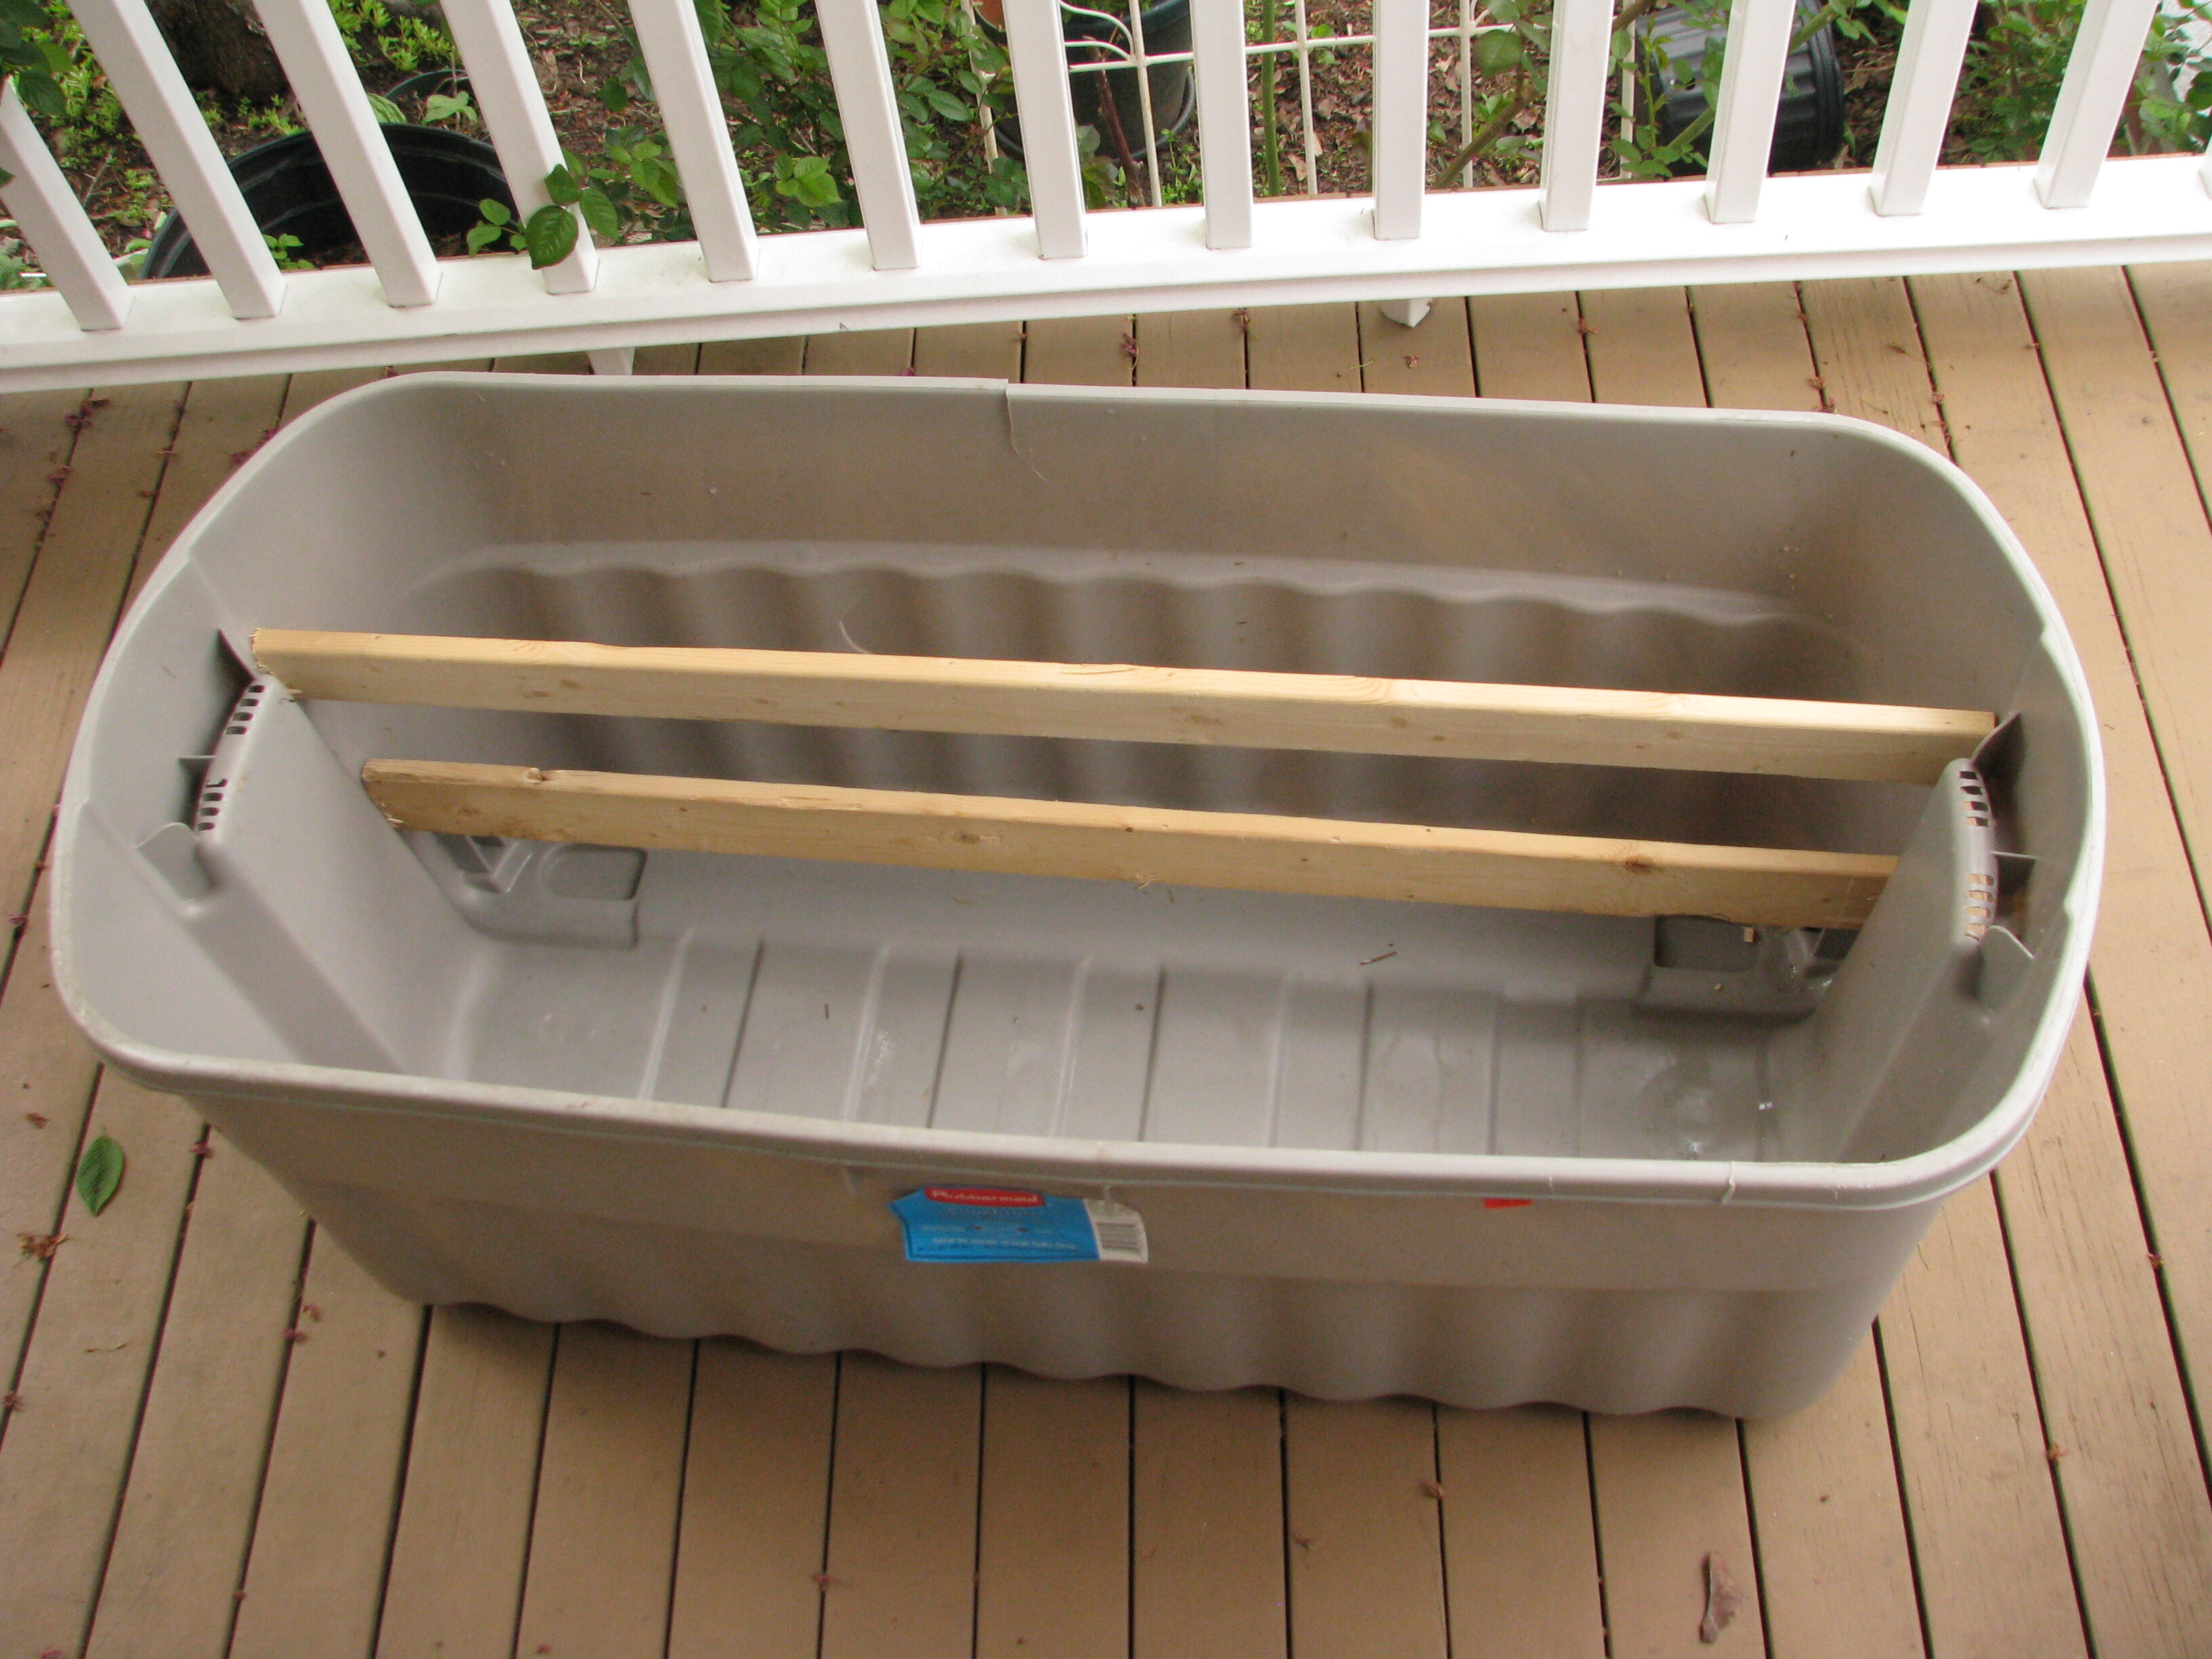
The main problem was the cracks. The soil pressure would cause the tub to bow out on the sides and would worsen the crack over time. One option I thought of was to tie the long side together via cords running through the tub, crosswise, resisting the bowing effect. Another was to brace the tub against something. What I ended up doing was cutting some boards to fit lengthwise so that they were pressing the narrow ends away from each other slightly. This might just cause new point strains on the ends and new cracks there, but it's worth a shot.
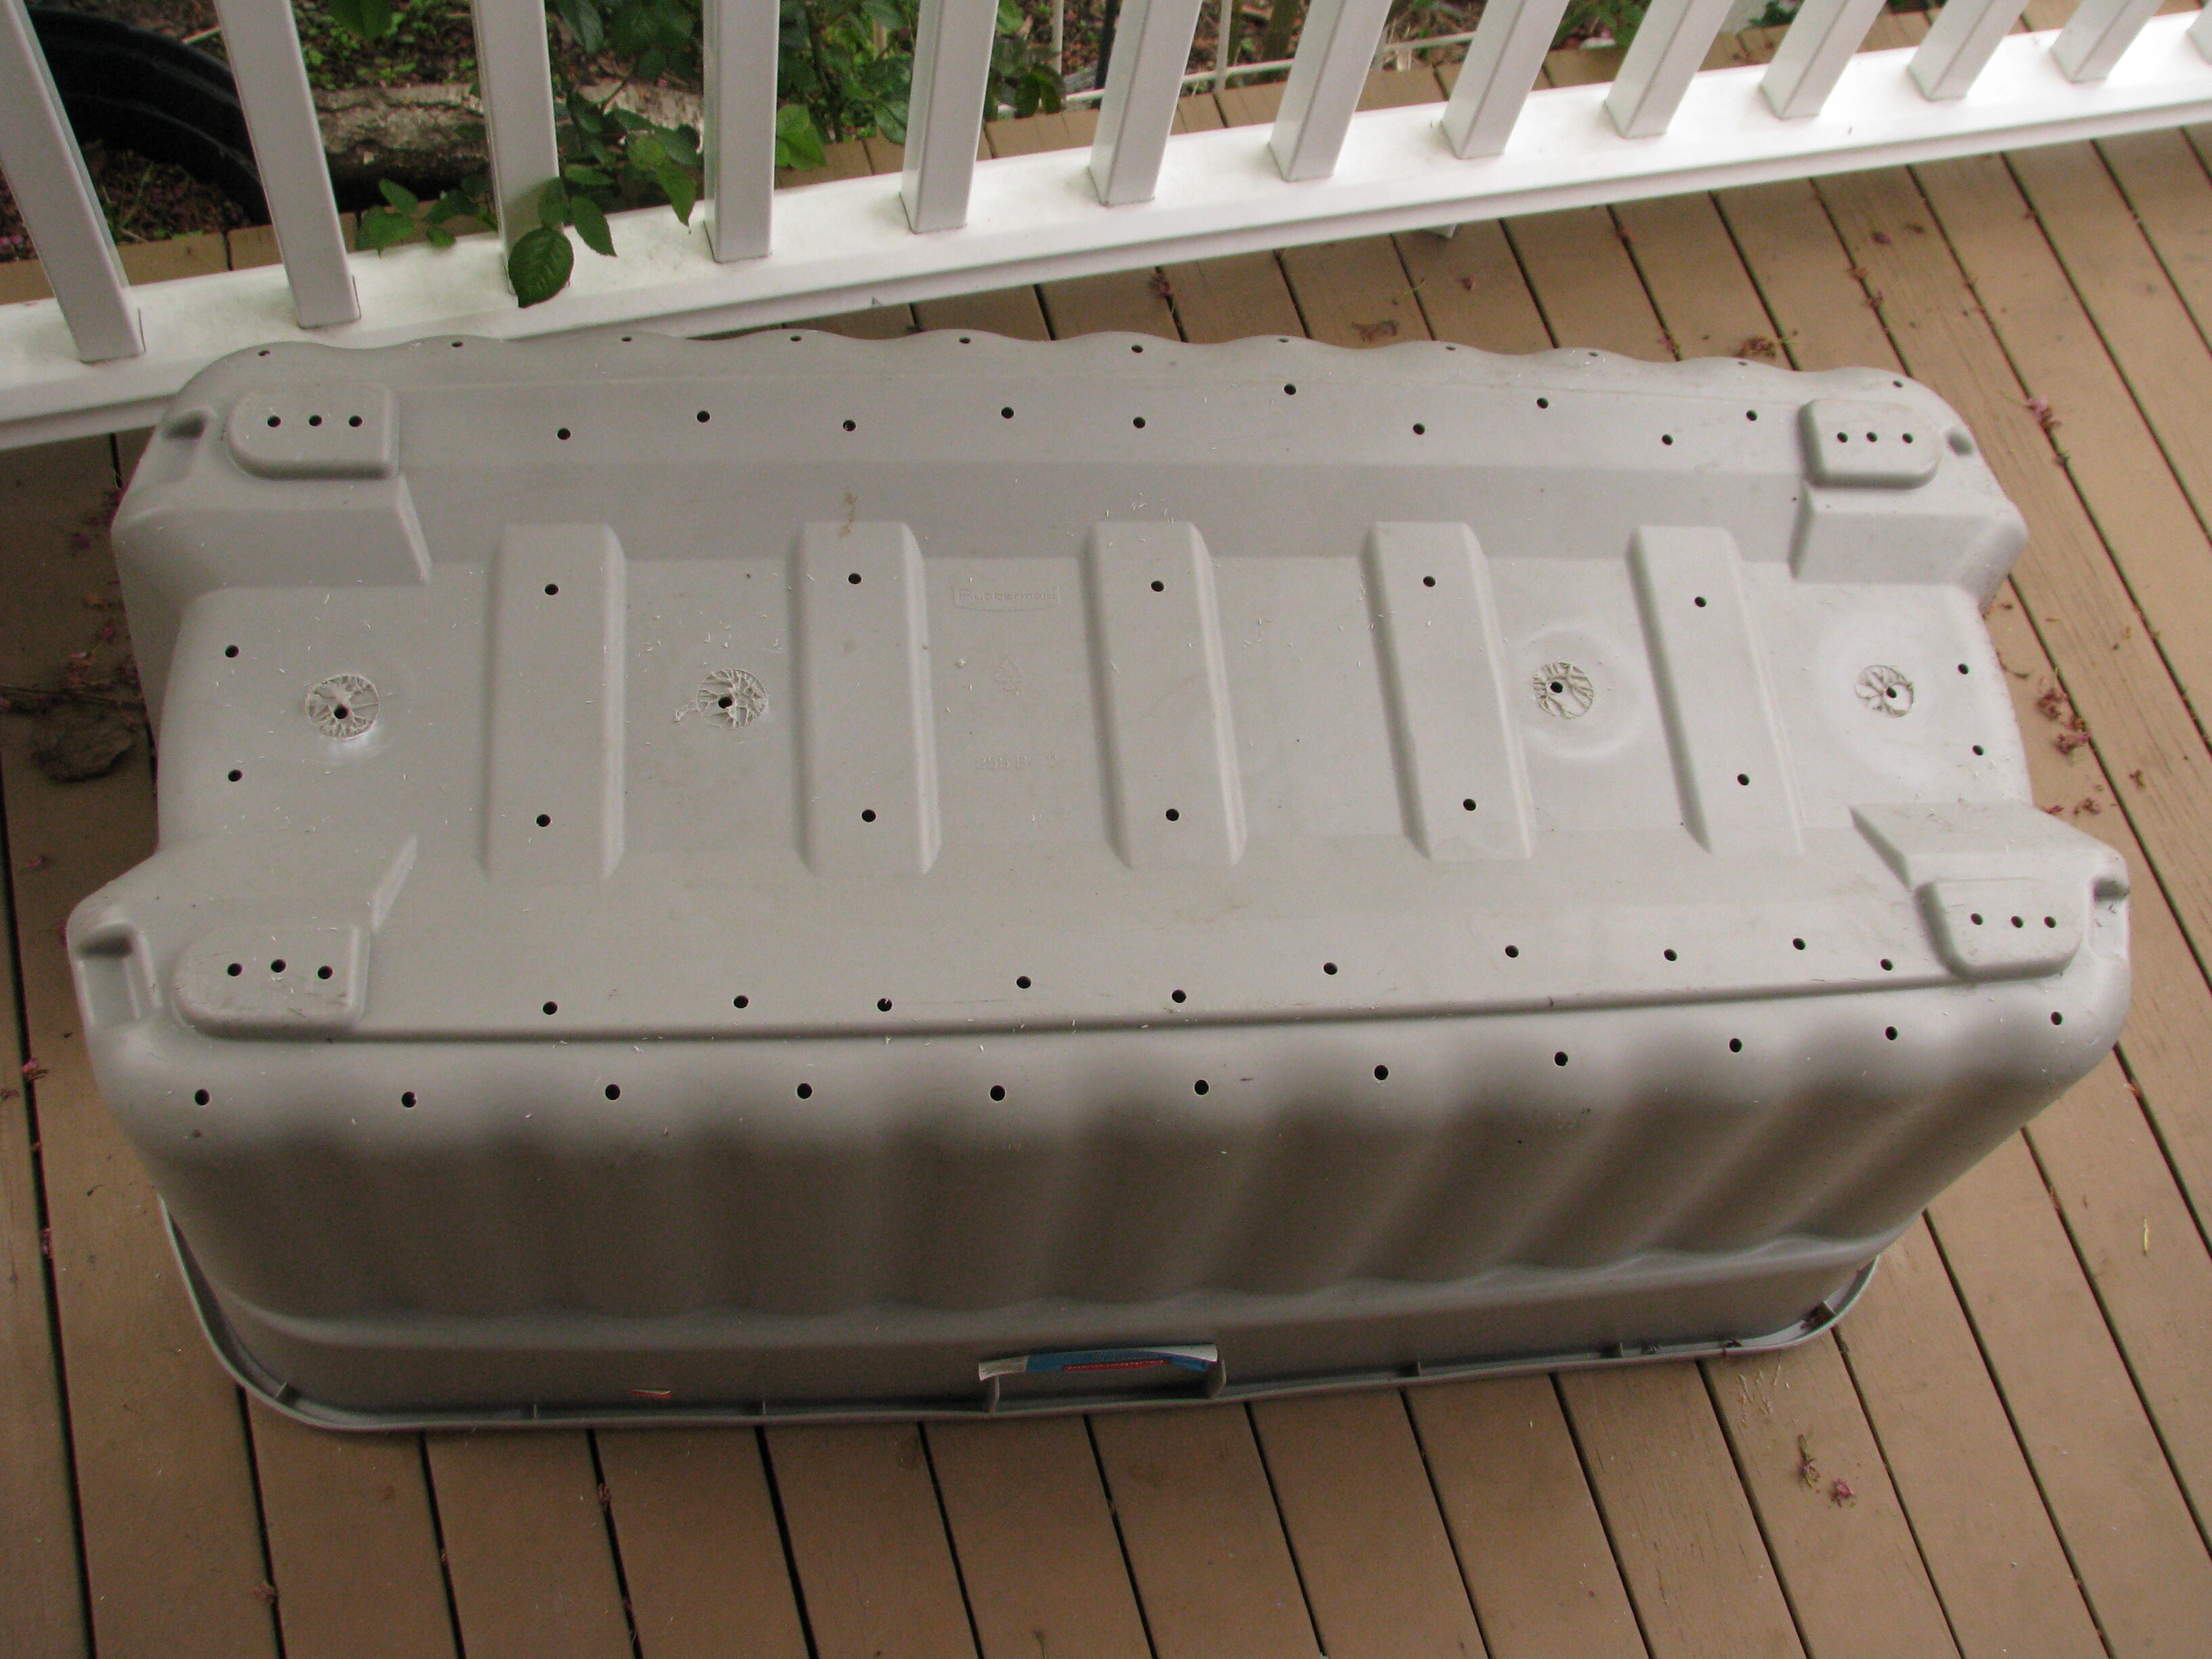
Next I had to provide drainage. I drilled about 70 holes into it along what should be the lowest points. I didn't like all the plastic shreds this generated, but I think I got almost all of it with the vacuum cleaner.
In some places (the last half of the work) I remembered to stagger the holes to avoid creating lines of weakness.
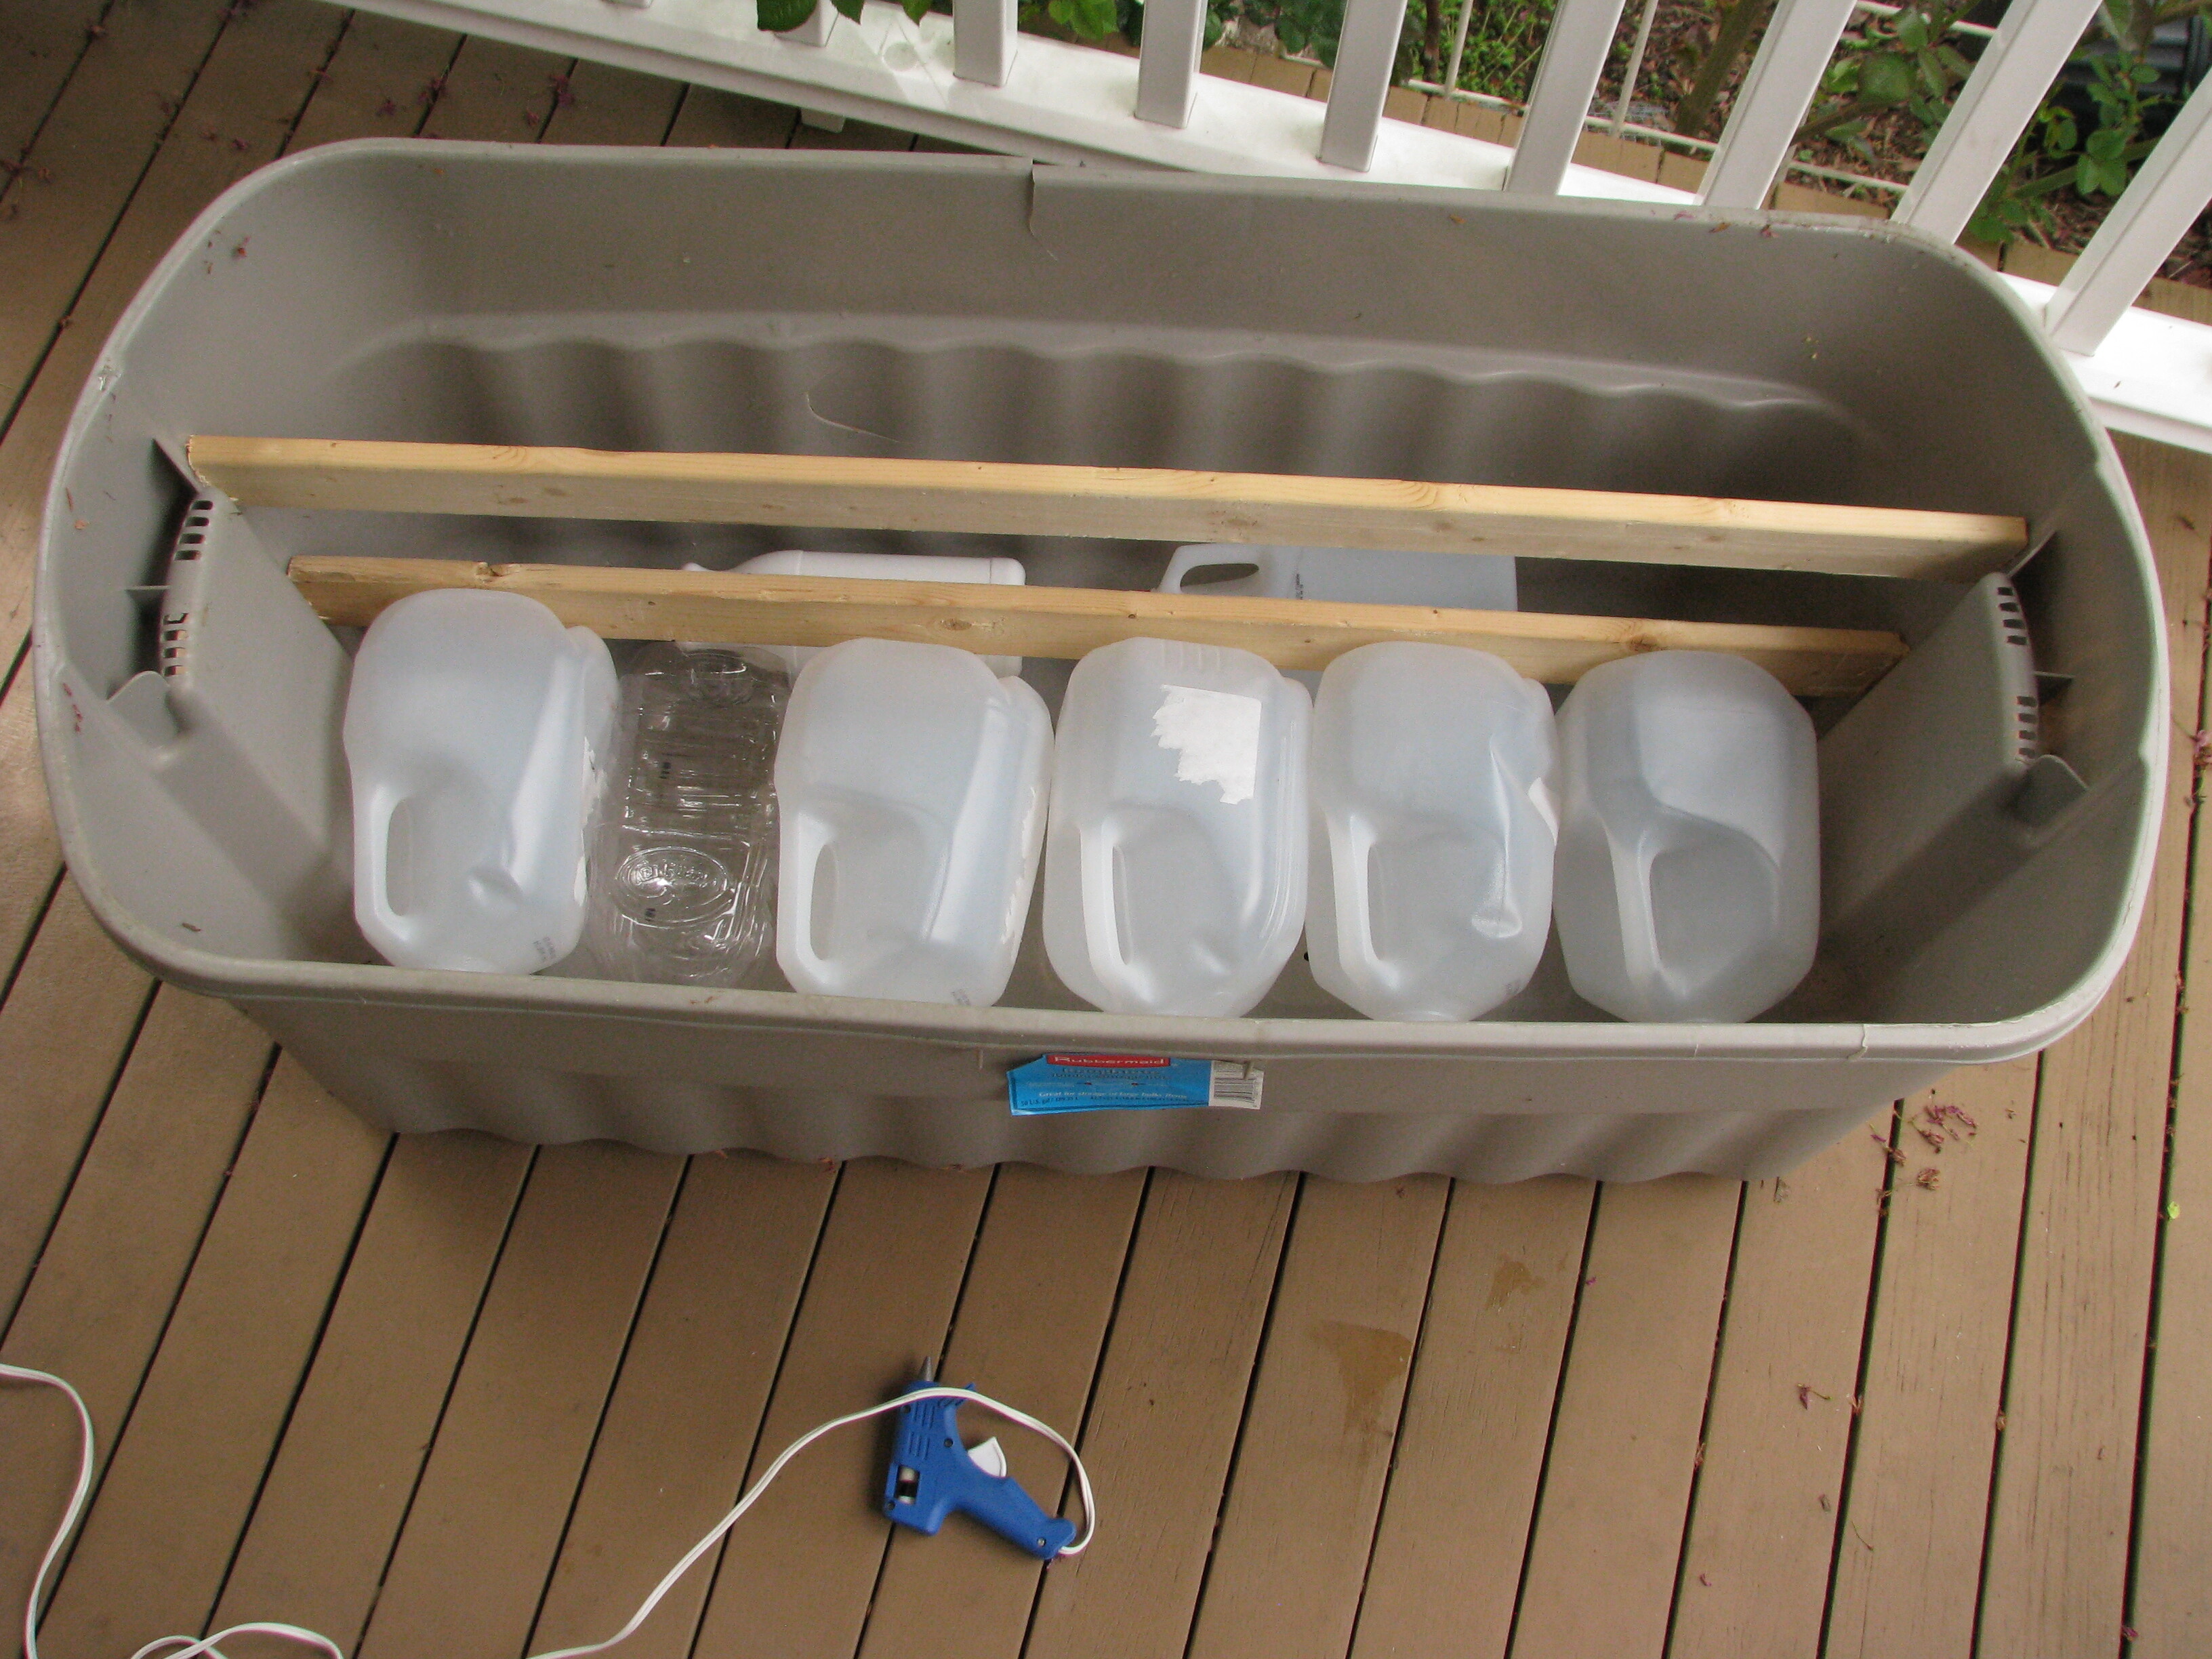
This is the silliest part. I didn't have enough material to fill it with, and I didn't actually need something all *that* deep. And I didn't want it to be so heavy it couldn't be moved. So I solicited some empty bottles from neighbors, tightened their lids (or hot-glued when necessary), and laid them down in the bottom. Now there's less space to fill, and less weight, but still something of a deep reservoir space for excess water to sit in before it exits.
These are all HDPE, same as the tub, so they should be *relatively* innocuous. We'll see if they collapse, or float up through the soil, or something else unwanted. They should stay fairly cool and protected, though.
Another option was to cut the tub shorter and raise it on blocks. Height is desirable for two reasons:
- We have a low wall around the front yard and I want the plants to get enough light
- I want to minimize soil splashup from the yard into the container
But that would reduce the structural integrity of the container even more.
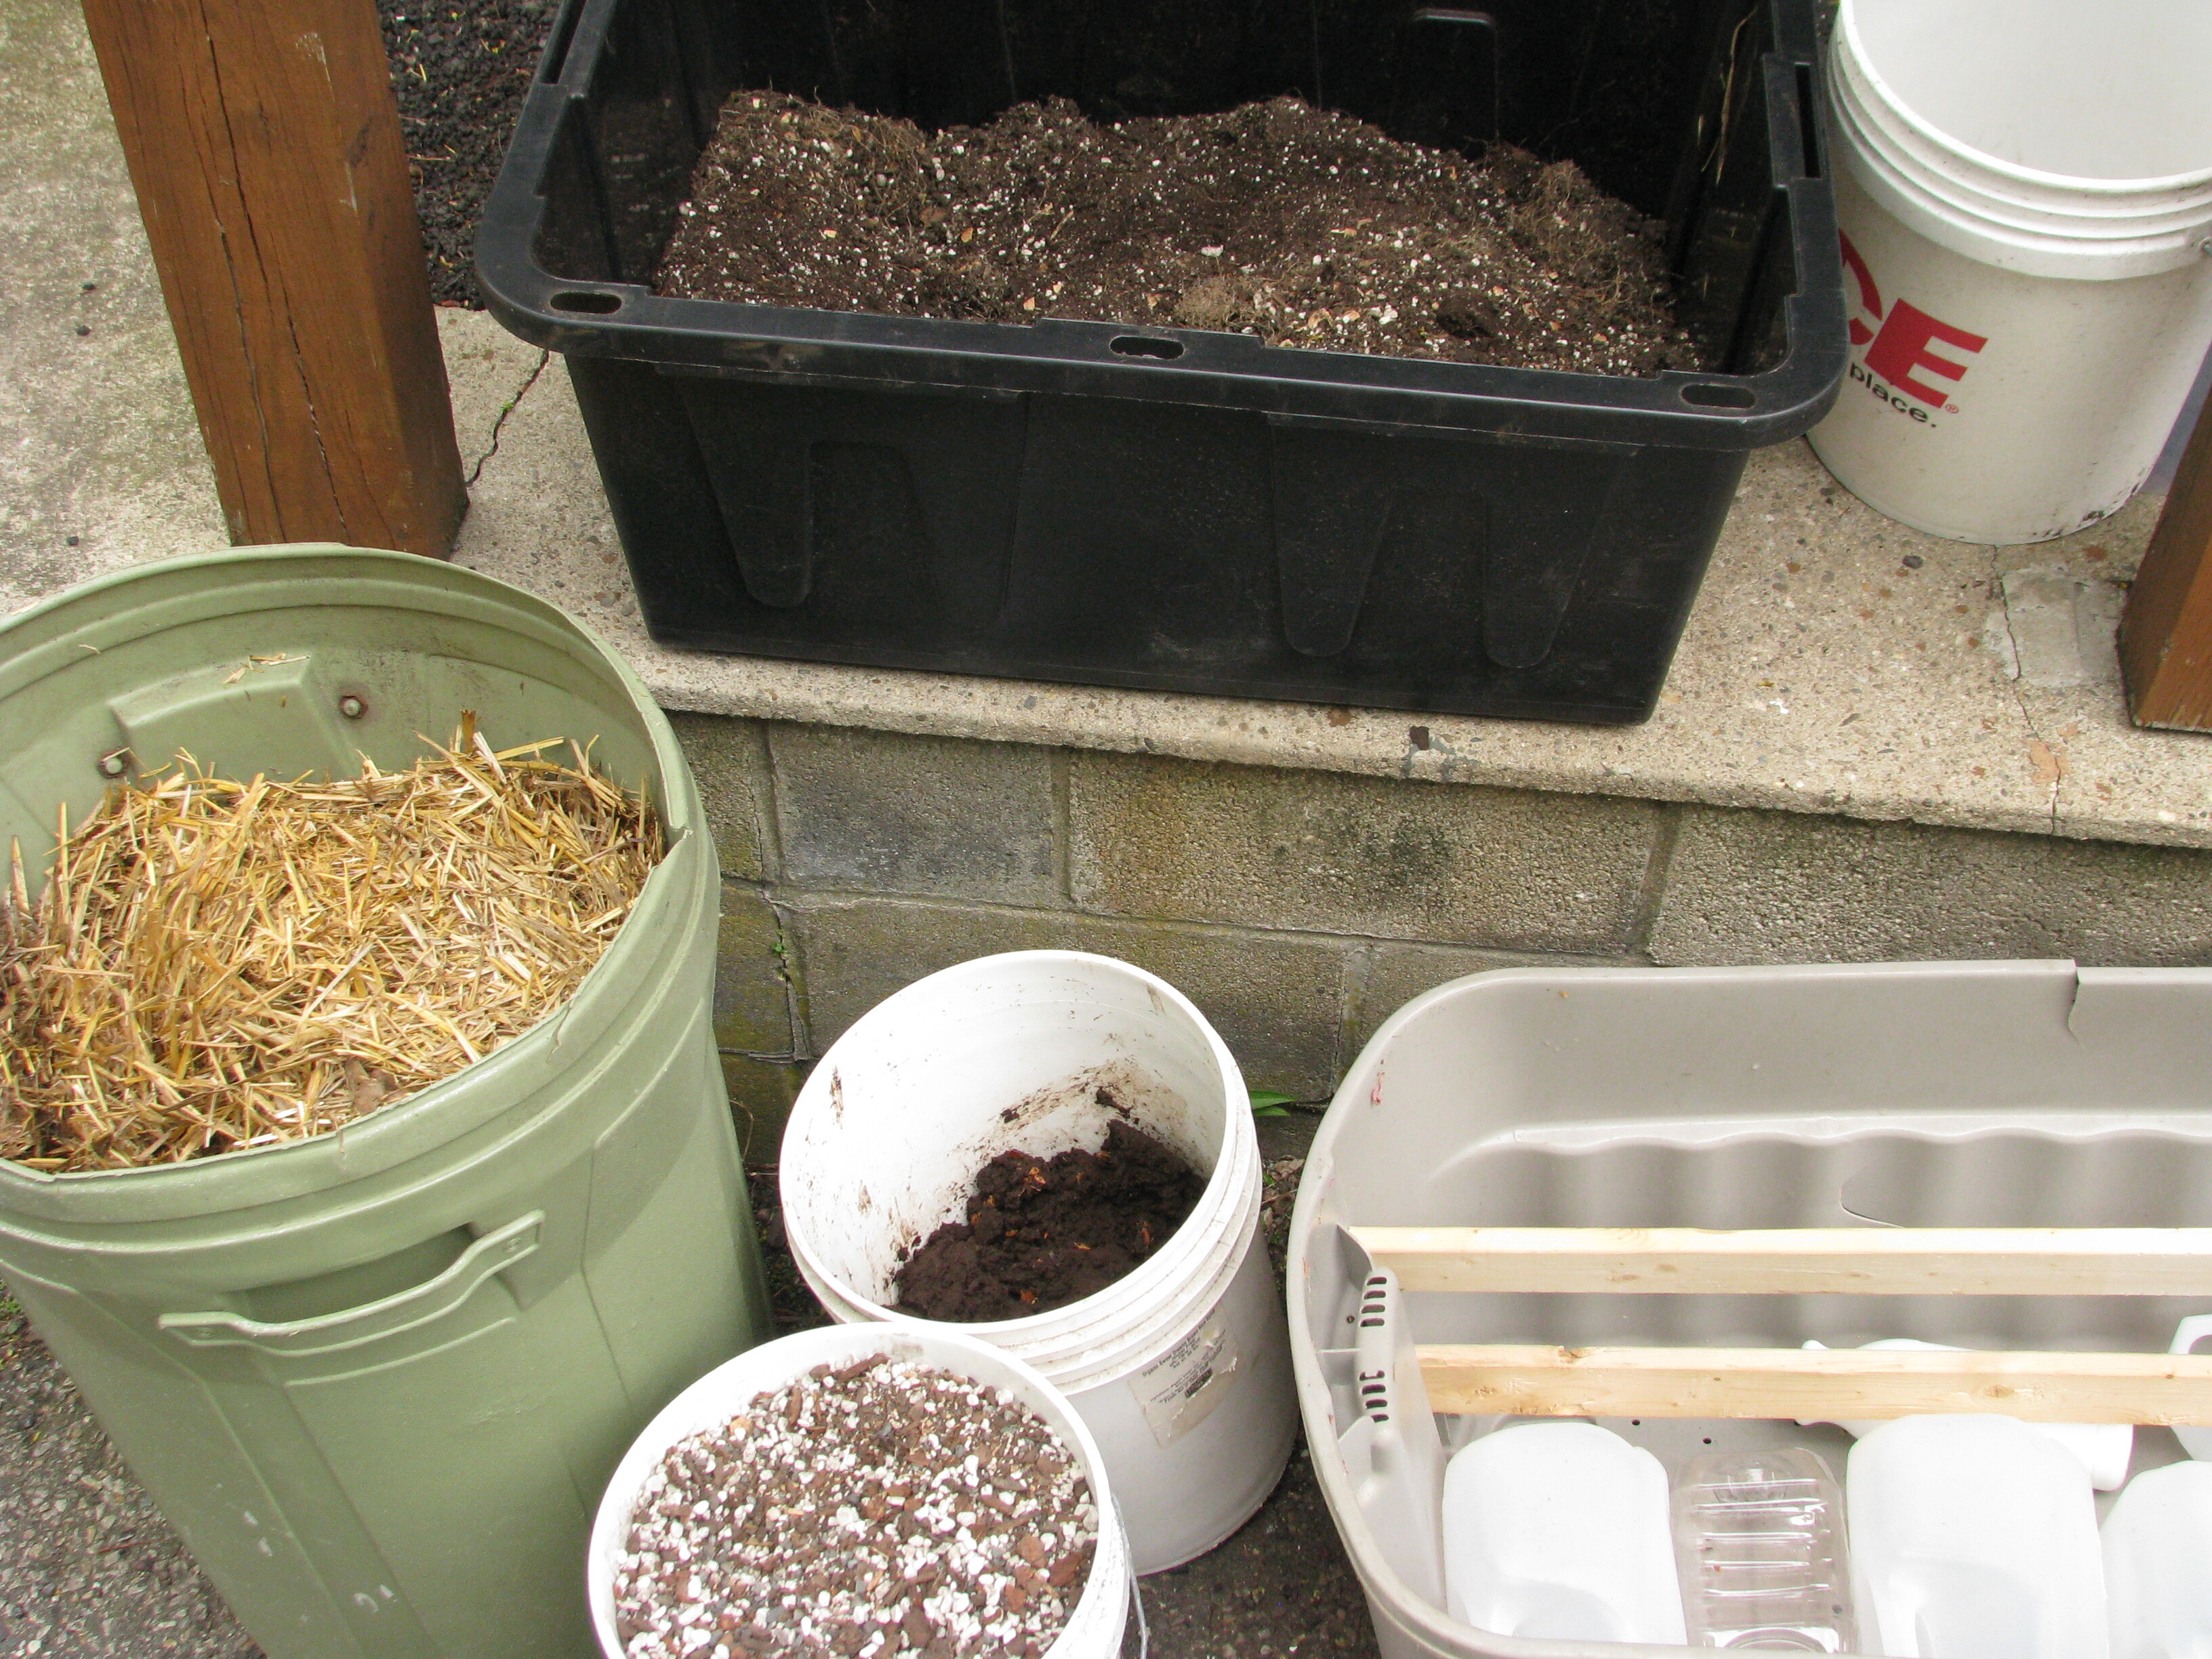
This is the material I had to work with:
- A half-rotten bale of straw. This is difficult to work into the soil, but will add structure and later carbon.
- In the black bin, about 10 gallons of really lovely used potting soil. It's from an organic gardener who always mixes hers down with vermiculite, perlite, and compost each year to rejuvenate it. It had a good deal of structure and cohesion and I hated to break it up.
- In the lower white bucket, about 5 gallons of substrate from another person on Freecycle. This is maybe 30% perlite, 20% expanded slate (new to me!), and 50% bark and other mulch. Seems like something you'd grow cactus in.
- And in the other white bucket, about 2 years of worm compost, maybe 2 gallons of it. Should be quite rich.
I started by packing straw in around the jugs to create a drainage layer (I hope?) and to use up less-nutrient-rich materials first. (There was also just a lot of straw, although I know it will compress over time.) Then I mixed everything else together, which required quite a lot of elbow grease. I remembered to wear an N95 to avoid breathing rock and soil dust, and it's neat that that's just a thing I have readily at hand these days. :-)

I moved the bin to its final location, which required a little re-grading to give it a flat, level surface to rest on. The cracked side is shoved up against the brick wall as additional reinforcement. The exposed side is likely going to get some sun and may get damage from that, so I may just like... lean some plywood up against it or wrap it with some other sun-blocking material. Dunno.
The straw is going to pack down over time, so I'll need to to pit off occasionally with more soil and compost, but that's fine. I may even consolidate some of my other, smaller pots into this one, which will have a similar effect.
Overall I'm pretty happy with this, and I'm interested to see how it holds up!
no subject
Date: 2022-05-10 07:43 pm (UTC)no subject
Date: 2022-05-10 07:48 pm (UTC)I'm very curious how much of solar degradation is UV vs heat.
no subject
Date: 2022-05-10 07:50 pm (UTC)